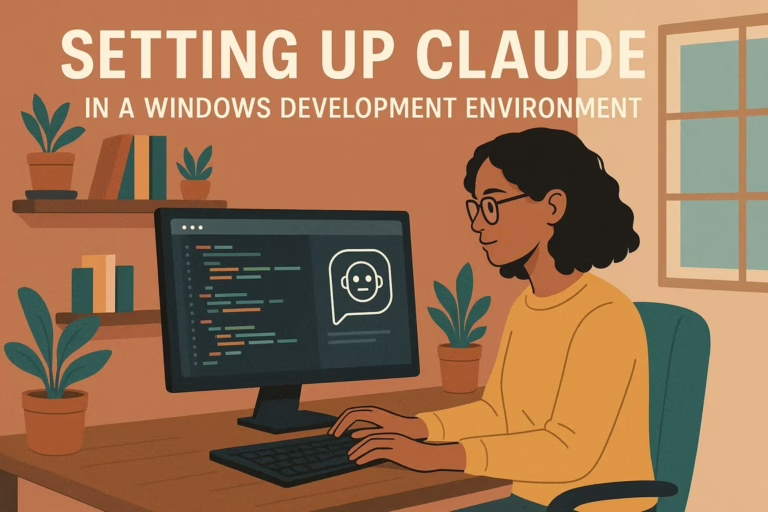
The Complete Guide: Setting Up Claude Code with WSL and Cursor on Windows
A developer's journey from frustration to a seamless AI-powered coding environment

Why This Guide Exists
If you’ve been struggling to get Claude Code working properly in your Windows development environment, you’re not alone. After watching countless developers hit roadblocks with IDE integration, terminal issues, and permission problems, I decided to document the complete solution that actually works.
This isn’t just another quick setup tutorial—it’s a comprehensive guide born from real troubleshooting experience. By the end, you’ll have a professional development environment that combines the power of WSL2, the elegance of Cursor, and the intelligence of Claude Code.
What You’ll Build
By following this guide, you’ll create:
- A modern WSL2-based development environment
- Seamless integration between Windows and Linux workflows
- Claude Code working flawlessly with Cursor IDE
- A organized project structure that scales
- Best practices for Python and Node.js development
Prerequisites
Before we dive in, make sure you have:
- Windows 10 version 2004+ or Windows 11
- Administrator access to your machine
- A stable internet connection
- About 1-2 hours of setup time
Phase 1: Preparing Your Windows Environment
Step 1: Update Everything
First things first—let’s make sure your Windows installation is rock solid:
- Open Settings → Update & Security → Windows Update
- Install all available updates
- Restart as needed (yes, even if it’s annoying)
Step 2: Install Essential Dependencies
These often-overlooked components prevent mysterious errors later:
Open PowerShell as Administrator and install:
- Visual C++ Redistributables (2005-2015, all versions)
- DirectX (all versions)
Pro tip: These dependencies are crucial for development tools compatibility—don’t skip them!
Step 3: Enable WSL Features
Still in Administrator PowerShell, run:
# Enable WSL and Virtual Machine Platform
dism.exe /online /enable-feature /featurename:Microsoft-Windows-Subsystem-Linux /all /norestart
dism.exe /online /enable-feature /featurename:VirtualMachinePlatform /all /norestart

# Restart Windows
shutdown /r /t 0
Phase 2: WSL2 Installation
Step 4: Install WSL2 with Ubuntu
After your restart, open PowerShell as Administrator:
# Install WSL2 with Ubuntu
wsl --install

# If that doesn't work, try:
wsl --install -d Ubuntu-22.04
Restart Windows again (I know, I know—but it’s necessary).
Step 5: Verify Your Installation
Open PowerShell and check:
wsl --list --verbose
You should see:
  NAME            STATE           VERSION
* Ubuntu-22.04    Running         2
If you see VERSION 1, upgrade it:
# Set WSL2 as default
wsl --set-default-version 2

# Convert existing installation
wsl --set-version Ubuntu-22.04 2
Step 6: Complete Ubuntu Setup
When Ubuntu opens:
- Create a username (lowercase, no spaces—trust me on this)
- Create a strong password
- Wait for the installation to complete
Step 7: Update Ubuntu
In your Ubuntu terminal:
sudo apt update && sudo apt upgrade -y
Phase 3: Building Your Development Stack
Step 8: Install Essential Tools
# Version control
sudo apt install git -y

# Network tools
sudo apt install curl -y

# Build tools
sudo apt install build-essential -y

# Python ecosystem
sudo apt install python3-pip python3-venv -y
Step 9: Configure Git
git config --global user.name "Your Name"
git config --global user.email "your@email.com"
git config --global init.defaultBranch main
git config --global color.ui auto
git config --global pull.rebase false
Step 10: Install Python with pyenv
Why pyenv? It gives you complete control over Python versions—essential for modern development.
# Install dependencies
sudo apt install make build-essential libssl-dev zlib1g-dev \
libbz2-dev libreadline-dev libsqlite3-dev wget curl llvm \
libncursesw5-dev xz-utils tk-dev libxml2-dev libxmlsec1-dev \
libffi-dev liblzma-dev -y

# Install pyenv
curl https://pyenv.run | bash

# Configure shell
echo 'export PYENV_ROOT="$HOME/.pyenv"' >> ~/.bashrc
echo 'command -v pyenv >/dev/null || export PATH="$PYENV_ROOT/bin:$PATH"' >> ~/.bashrc
echo 'eval "$(pyenv init -)"' >> ~/.bashrc

# Reload configuration
source ~/.bashrc

# Install Python
pyenv install 3.11.8
pyenv global 3.11.8
Step 11: Install Node.js with nvm
Similar reasoning—version management is crucial:
# Install nvm
curl -o- https://raw.githubusercontent.com/nvm-sh/nvm/v0.39.0/install.sh | bash

# Reload configuration
source ~/.bashrc

# Install latest LTS Node.js
nvm install --lts
nvm use --lts
Phase 4: Setting Up Cursor IDE
Step 12: Install Cursor
- Download Cursor from the official website
- Install with default settings on Windows
Step 13: Essential Extensions
In Cursor, press Ctrl + Shift + X and install:
- Remote – WSL (
ms-vscode-remote.remote-wsl) - Remote Development (
ms-vscode-remote.vscode-remote-extensionpack) - Python (
ms-python.python) - Prettier (
esbenp.prettier-vscode)
Step 14: Configure Cursor for WSL
Press Ctrl + , to open settings, then configure:
{
    "terminal.integrated.defaultProfile.windows": "WSL",
    "terminal.integrated.cwd": "~/dev/projects",
    "remote.WSL.fileWatcher.polling": true
}
Phase 5: Organizing Your Development Environment
Step 15: Create a Professional Project Structure
Organization matters—here’s a scalable structure:
# Create main development directories
mkdir -p ~/dev/{projects,tools,workspace,templates}
mkdir -p ~/dev/projects/{python-projects,js-projects,ai-automation}

# Verify structure
ls -la ~/dev/
ls -la ~/dev/projects/
Step 16: Add Helpful Aliases
Edit your bash configuration:
nano ~/.bashrc
Add these time-saving aliases:
# Navigation shortcuts
cd ~/dev/projects

# Useful aliases
alias dev='cd ~/dev/projects'
alias tools='cd ~/dev/tools'
alias py='cd ~/dev/projects/python-projects'
alias js='cd ~/dev/projects/js-projects'
Save with Ctrl + O, Enter, Ctrl + X, then:
source ~/.bashrc
Phase 6: Fixing NPM Permissions
Step 17: Configure NPM Global Directory
Avoid permission headaches:
# Set NPM global prefix
npm config set prefix '~/.npm-global'

# Update PATH
echo 'export PATH=~/.npm-global/bin:$PATH' >> ~/.bashrc

# Reload
source ~/.bashrc
Phase 7: Installing Claude Code
Step 18: Install Claude Code
Navigate to your projects directory:
cd ~/dev/projects

# Install Claude Code (follow current Anthropic documentation)
npm install -g claude-code

# Alternative if pip package is available:
# pip install claude-code
Step 19: Initial Claude Code Setup
# Start Claude Code
claude-code
When prompted about terminal setup, choose Option 1: “Yes, use recommended settings”.
Phase 8: Connecting Everything Together
Step 20: Connect Cursor to WSL
- Open Cursor
- Press
Ctrl + Shift + P - Type “WSL: Connect to WSL”
- Or click the WSL icon in the bottom left
Step 21: Open Your Workspace
In WSL terminal:
cd ~/dev/projects
code .
Verify the connection:
- Cursor opens successfully
- Bottom left shows “WSL: Ubuntu-22.04”
- Integrated terminal (`Ctrl + Shift + “) shows Linux prompt
Step 22: Integrate Claude Code with Cursor
In Cursor’s WSL terminal:
cd ~/dev/projects
claude-code
Claude Code should automatically detect Cursor. Test with:
/ide # Should show Cursor integration
Phase 9: Testing Your Setup
Step 23: Verify All Components
Run these commands to check everything:
# Version checks
git --version
python --version
node --version
npm --version
pyenv --version
nvm --version

# Path verification
which python  # Should show pyenv path
which node    # Should show nvm path
pwd           # Should show ~/dev/projects
Step 24: Test Python Environment
cd ~/dev/projects
mkdir test-python && cd test-python
python -m venv venv
source venv/bin/activate  # Note: Linux syntax!
python --version
pip list
deactivate
cd .. && rm -rf test-python
Step 25: Test Node.js Environment
cd ~/dev/projects
mkdir test-node && cd test-node
npm init -y
npm install express
npm list
cd .. && rm -rf test-node
Understanding WSL vs Windows Differences
This is crucial knowledge for smooth development:
| Aspect | Windows | WSL/Linux |
|---|---|---|
| Paths | D:\dev\projects |
/mnt/d/dev/projects |
| Home | C:\Users\username |
/home/username |
| Virtual Env | venv\Scripts\activate |
source venv/bin/activate |
| Package Manager | choco install |
sudo apt install |
Troubleshooting Common Issues
Claude Code Installation Problems
If you encounter EACCES errors:
npm config set prefix '~/.npm-global'
echo 'export PATH=~/.npm-global/bin:$PATH' >> ~/.bashrc
source ~/.bashrc
npm install -g claude-code
Terminal Path Issues
If you see Windows paths in WSL:
cd  # Return to home
pwd  # Should show /home/username
cd ~/dev/projects  # Use correct WSL path
WSL Issues
Check and restart WSL:
# Check status
wsl --status

# Restart WSL
wsl --shutdown
# Then reopen Ubuntu
Cursor-WSL Integration Problems
- Press
Ctrl + ,→ search “terminal.integrated.cwd” → clear the setting - Restart Cursor
- Run “WSL: Connect to WSL” again
Best Practices for Your New Environment
Python Development
✅ Always use virtual environments in WSL
✅ Use Linux syntax: source venv/bin/activate
✅ Create requirements.txt for every project
✅ Never commit venv/ to Git
Node.js Development
✅ Use NPM without sudo (thanks to our global config)
✅ Prefer local package installation
✅ Use npx for one-time tools
✅ Never commit node_modules/ to Git
WSL Workflow
✅ Do all development in WSL
✅ Configure Git in WSL
✅ Always connect Cursor to WSL
✅ Install development tools in WSL
Quick Reference Guide
Essential Commands
# Navigate to projects
dev                     # Your custom alias

# Python workflow
python -m venv venv && source venv/bin/activate

# Open Cursor
code .

# Start Claude Code
claude-code

# Check WSL status
wsl --list --verbose
Important Paths
- WSL Home:
/home/username - Projects:
~/dev/projects - Windows C Drive:
/mnt/c/ - Windows D Drive:
/mnt/d/
File Access Between Systems
- Windows to WSL:
\\wsl$\Ubuntu\home\username\dev\projects - WSL to Windows:
/mnt/c/or/mnt/d/
Wrapping Up
Congratulations! You now have a professional-grade development environment that combines the best of Windows, Linux, and AI-powered coding assistance. This setup will serve you well for Python development, Node.js projects, and any AI automation work you want to tackle.
The key to success with this environment is understanding that you’re primarily working in Linux (WSL) while still having access to your Windows tools. Embrace the Linux command line, use the aliases you’ve set up, and let Claude Code enhance your coding workflow.
Final Checklist
Before you start your first project, verify:
✅ Windows updates installed
✅ Visual C++ Redistributables & DirectX installed
✅ WSL2 enabled and Ubuntu installed
✅ Ubuntu updated
✅ Git configured
✅ Python with pyenv installed
✅ Node.js with nvm installed
✅ Cursor with WSL extensions installed
✅ NPM configured without sudo
✅ Development structure created
✅ Claude Code installed
✅ Cursor-WSL integration working
✅ Claude Code detects Cursor
✅ Terminal opens in ~/dev/projects
✅ All tests successful
🎉 Installation Complete! You’re ready to build amazing projects with your new AI-powered development environment.
Have questions or run into issues? The development community is always here to help—don’t hesitate to reach out with your specific setup challenges.
🚀 Join Our Remote Work Community!
Connect with remote workers, digital nomads, and online entrepreneurs in the 404: Office Not Found Discord community.
Get access to:
- Job opportunities & referrals
- Location-independent lifestyle tips
- Networking with industry pros
- Proven online income strategies


